Saturday 28 January 2012

Bulkhead

The old bulkhead had been modified in the past. It looks like someone had welded into place an extra section above the original bulkhead in order to fully enclose the rear load space. Barndoors never had a full height metal bulkhead (yes, there was an optional accessory closing panel with a window in it, but not a metal panel).

Then, later in its life, this 'new' bulkhead had been cut back down to something like original height, but badly done. So, we cut the whole lot out when the cab came off and have fitted a new one:

Here the bulkhead is offered up into place to check alignment with the chassis cross-member, and front chassis rail frame liners.

The bulkhead is tacked into place on the return lip of the frame liner.


Here we have the 'B' post clamped into place too so we can check the position against the chassis, side panel, roof line and bulkhead


From the 'cargo' area of the van, the bulkhead is now in place

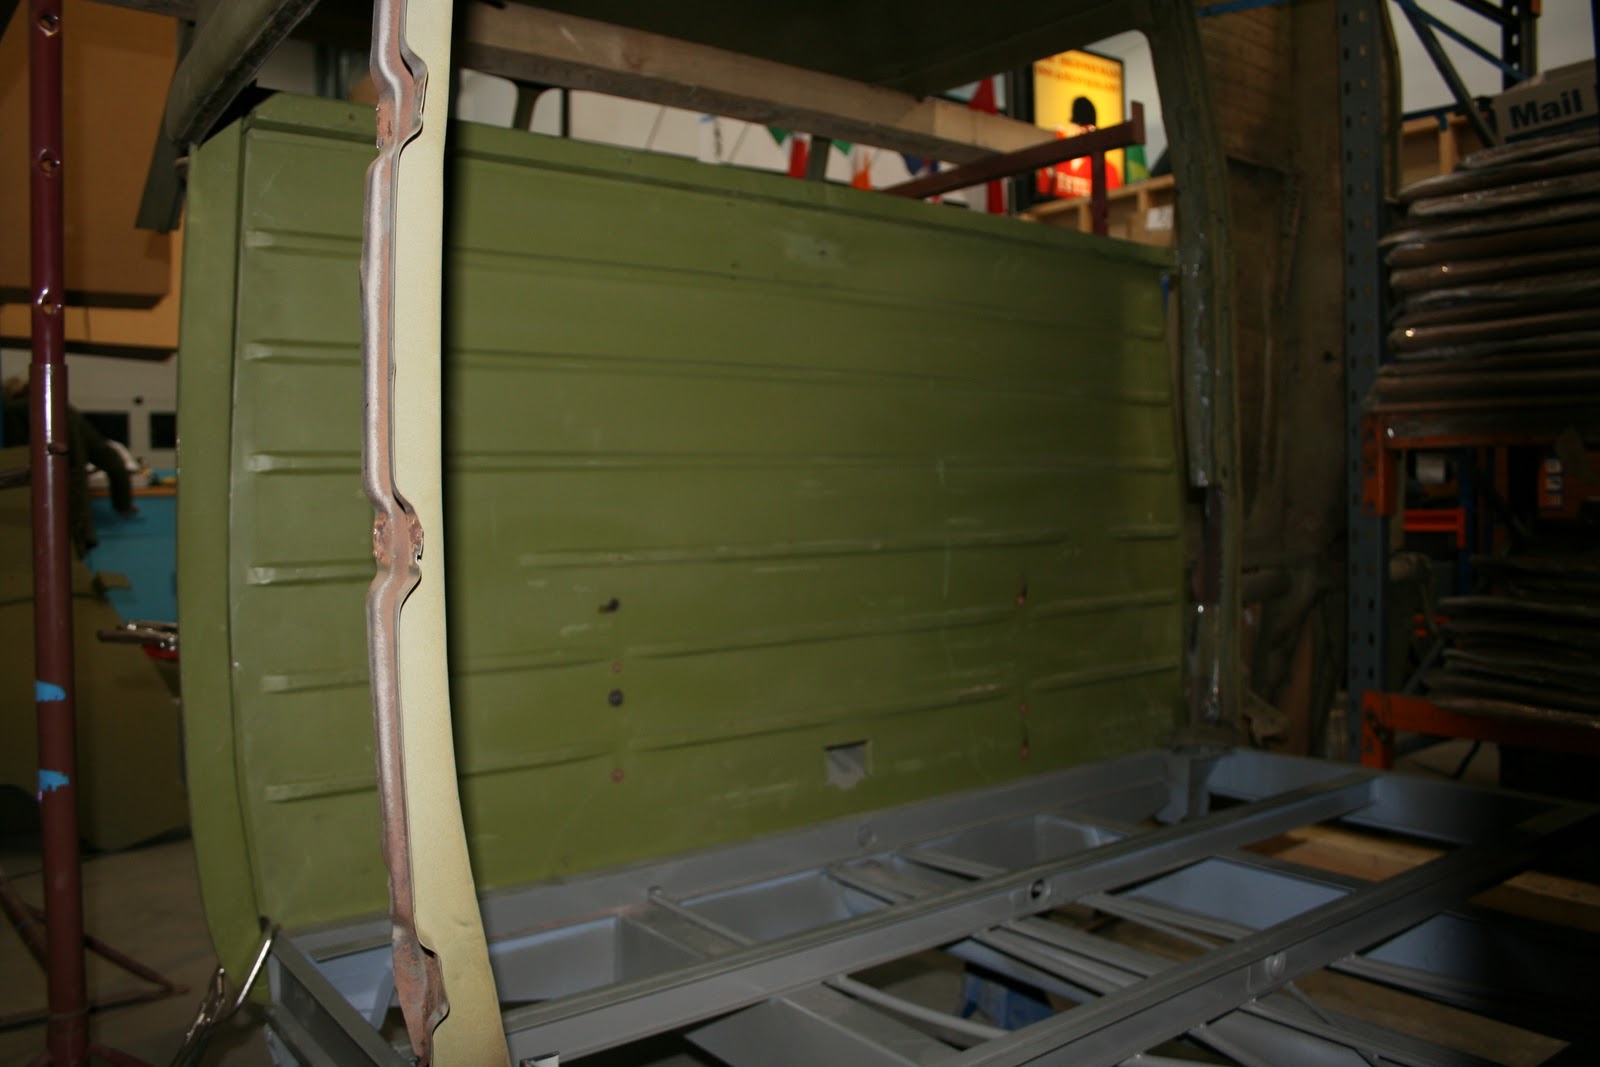
Original spot-weld spacings are reproduced so the panel looks factory fresh.

Friday 27 January 2012

The Cab Comes Off.....!

Yes, you did read that correctly, we've cut the cab off, not just a bit of it, all of it!!!

The cab area had been so badly messed with over the years, we could not accurately rely on any of the measurements or datum points. The only way to make sure the door gaps are perfect and that it all lines up was to cut it off and re-build it piece at a time!!!

You can see we've cut through the windscreen pillars - the roof is supported so it doesn't droop or bend causing damage.

Several minutes later and the cab section is mobile.....

And that's all we've got left.......

Here's the cab on the floor now, we can take this apart piece at a time now and work on it properly. The cab was so badly messed with that we can't rely on any measurement and if we did, it would through out the entire re-build.

Long Side Trial Fit

The long side panel gets tacked into place.....

All the seams are cleaned up and made ready first.

First fit into place - panel gaps looking good and fit is excellent.


From the inside, we've fitted the two horizontal supports into place to give the panel some support and strength too. Nice fit around the wheel arch and up the 'B' post too.

Now the lower side is in place, we can work on straightening out the swage line and the upper side as we know we have a true straight edge to work to.

Long Side Panel Work

After removing the long fixed side panel and leaving the vertical and horizontal supports in place, we proceeded to remove the supports so we can work on them properly.

The 2nd vertical support - note the recess where the horizontal support pieces fit between the upright and the actual side panel. These need to be straightened out.

 The small gap between the upright and the swage line is where the return lip on the top of the side panel fits into plate.

Here you can see the recess for the lower horizontal support and where the upright meets the chassis. This will be removed later to repair it.

Wednesday 25 January 2012

Full Side Panel Comes Off

Yep, we took the angle-grinder to the side panel and hacked it off, well, we were a bit more delicate than that!! We can now start repairing the vertical and horizontal support bars before trial fitting the side panel.


Here you can see an internal support bar that we've welded into place to keep the structural integrity of the van whilst we work on the side supports


The side cross-members will be removed and replaced as they are beyond reasonable repair.

The rear vertical support bar that the firewall is attached to - needs work at the base, but now we can access it easier.

One of the vertical support bars again needs substantial work at the base to repair it. This is where its welded to the chassis - this is all loose at the moment so it can be repaired properly.

What's left of the 'B' post is shown here - this will all be cut out and new ones welded into place.

The upper part of the 'B' post showing where the side supports join. You can just see the underneath of the swage line in this photo.

Tuesday 24 January 2012

'C' post & Cargo Door

Work continues on the 'c' post and rear side panel. Before we can do any work to the fixed side, we need to make sure the 'c' post is back in place, welded up and secured in order to maintain strength in the vehicle.

Here we've got the 'c' post welded in place so we can hang the NOS cargo door to check the panel alignment and the door gaps.

Not the best photo ever, but we're trying to ensure the swage line stays 100% true and arrow straight along the length of the van.

The small side panel is now welded in place and the door gap is perfect.

Here you can see the inside of the cargo door and the side panel in place. We've tack-welded a support piece across the width of the van - this is to keep strength in the van when we take the other side off

NOS side cargo door in place and door gaps all perfect.

Thursday 12 January 2012

Wheels

This morning we collected 5 shiney newly painted wheels from the paintshop.

The wheels are painted in L82 Silver White which is the original colour. Gloss finish.


Just got to get the tyres fitted, then a final polish then they're ready to go on the van!

Wednesday 4 January 2012

And The Award For The Painting Goes To.......

..... Trevor Franklin at The Cotswold Bodyshop.

We weren't going to let anyone with a paint gun paint our van - it had to be someone we could trust, someone who understood the level of detail we were aiming for, someone who completely grasped the entire concept of the project from the very first time we spoke to them. We are pleased to report that we've found them: Trevor Franklin at The Cotswold Bodyshop.

They recently painted a race-car for a friend of ours and we were utterly blown away by the standard they had achieved.

Having discussed the project several times with them over the last 4-6 weeks, at every time they completely understood what we were trying to achieve. Their level of customer feedback and customer support is exactly the same as what we aim to deliver to our customers.

Their multi-award winning, multi-million pound, state of the art complex only built in 2008 paints and finishes only the finest car marques you can think of: BMW, Aston Martin, Bentley, Porsche, Audi and Mercedes-Benz to name a few.

They have already been given the wheels to paint and we'll detail the work involved and photos as soon as we get them back in the next week or so.