Saturday 19 January 2013

Fitting The Gearbox & Reduction Boxes

Once we'd finished having a bit of fun bolting on some goodies, we turned our attention to more serious jobs - like fitting the gearbox we had re-built and then getting the reduction boxes on. Here we go through the steps of fitting the 'box and the rear suspension.

Here we have the complete gearbox balanced on a trolley jack and it is slowly raised up into position:

Almost in place, we check the alignment and the continue raising it up into its position.

And its in place and all bolted up!

Here's a side view showing the 'box all in-situ


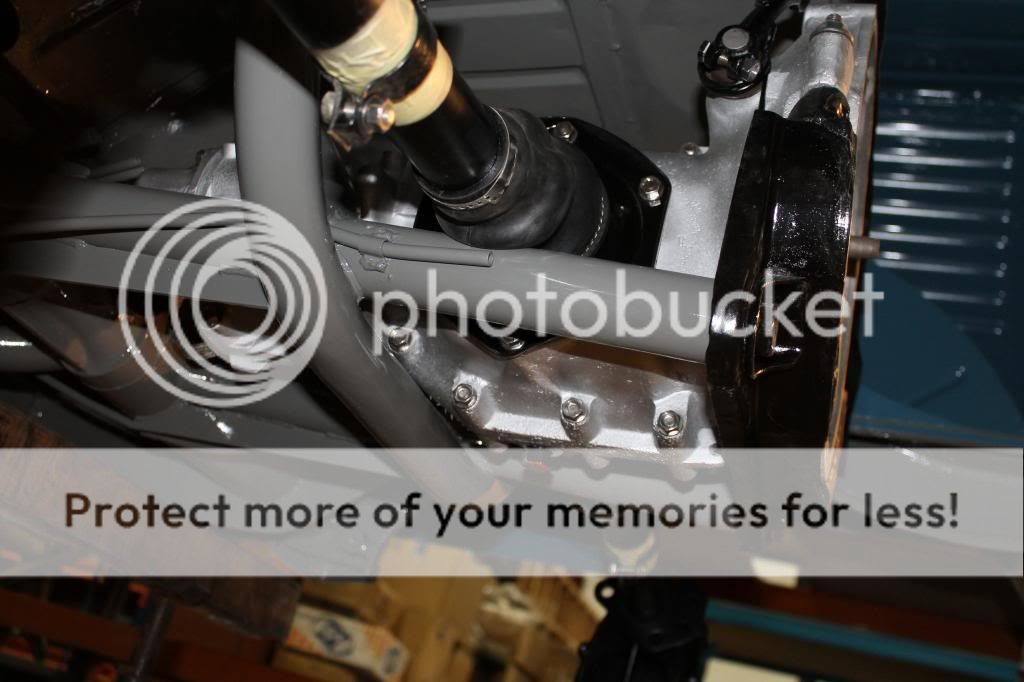
Next we re-assemble the reduction boxes. Due to an error by someone else (nothing to do with us), we had to strip the reduction boxes, the axle tubes and re-assemble them. Here we have got the tubes back in place and are re-assembling the reduction boxes:

Here the inner reduction box case is fitted into place first:

Next the reduction gears are fitted:

Next we fit new bearings then new reduction box gaskets are fitted. Click here to buy yours!

Now the outer reduction box casing is fitted and the whole thing bolted up using new stainless steel bolts, washers & nuts:

Finally, the oil fill and drain plugs are fitted - note the red blob of paint to denote a 'service' point - these were done as the vehicles left the factory so the customer and dealers could easily identify regular service items:


Finally the rear spring plate rubbers and the outer covers were fitted to complete the rear suspension.
Click here to buy your spring plate covers and bushes


Bolting Things On!!!

As soon as we got the van back into our warehouse from the paint shop, we just couldn't wait to start bolting on as many bits and pieces as we could!!!

Here we go:

The Front badge gets fitted first. Some little rubber pads were made to go behind the fixing screws so we don't damage or scratch the paint:


The rear window glass and seal was fitted next. Click here to buy your window seals!
We only use and supply the very best German made seals with all moulded corners - it was less than 4 minutes to fit this! You can't see the large SEKURIT logo on the glass in this pic, but check it out when you see the van at a show!


The rear lights and reflectors got fitted next along with the number plate light, unit and trim and the central brake light. Note the barndoor had the orange brake light and large number plate light upto chassis number 20-41711. After this, it went to the red lens and the smaller type number plate lens:


The front bumper, front number plate and headlights went in next
We supply a range of bumper parts and headlight parts - click the relevant words to access our shop!


Next we had a trial fit of the speedo dash pod and the passenger grab handle:


We then turned our attention to the rear of the van again and the engine firewall seal went in - very easy to fit whilst the engine is out!!! Click here to buy yours! Suit all model years of split van!


Next we tackle the gearbox being fitted. Check out the next post coming soon!

Thursday 17 January 2013

Some More Detailed Photos After Painting

Once the van was back in the workshop, we took some more close-up shots of the paintwork:


Now the work starts putting it back together!!!

Please note: if you do pop into the shop, please don't be offended if we refuse to show you around the warehouse - due to health & safety, we're unable to let you through into warehouse!


Aaaaannnnnd its back!

Our barndoor 'Bam-Bam' was finally returned to us recently from the guys at Cotswold Group Bodyshop.

Here you can see the van arriving back at our premises. Now we can start the re-build......

The wagon arrives and backs-up to our loading doors

Once in place, the curtain sides are removed and we get the first glimpse 


And now its ready for us to start re-building